Showing posts with label wool. Show all posts

Friday, 20 August 2021

Building Eloisa and Adrienne

Three new makes for the price (blog post) of one. This skirt and two tops were made in the last few weeks, and bring my Whole 30 fabric usage to 7.5 metres. 

This skirt is one I've been meaning to make. I've had both the fabric and the pattern for at least a couple of years. The fabric was bought at Pitt Trading when they still had a physical store, and is a wool twill.

The skirt is fairly simple in design. It's a 1933 skirt from the McCall's Archive Collection. What makes it stand out are the overlapping triangular yoke pieces and lowered box pleats, both accentuated with topstitching. It also has a raised waistband which sits just above the natural waist. The wool twill has a good body to it, so it holds the shape of the pleats very well.

I raised the hem by about an inch to make it a bit  more modern and wearable. It's still very much a 1930's skirt but in a way that feels vintage without becoming costumey. The topstitching at the corners and top of the pleats isn't quite perfectly aligned, but the lines in a grey just slightly darker look great.

The first top is an adaptation of the Eloisa pattern from Named Clothing's new Building the Pattern book. The book's six basic patterns each have multiple variations to play around with. For this top I used the upper front, back and lower front 1 each extended approximately 10cm, the puff sleeve and the neckband. The top was still slightly too short so I added a hem band which I don't entirely like the look of, but if I wear it tucked in like with this skirt it won't be seen. The batwing shape of the top looks nice tucked into a waistband.


The fabric is a charcoal merino jersey from The Fabric Store. It's lightweight with tiny textural pindot perforations, but the pindots do not make it seethrough. This top was sewn up entirely with my overlocker with the exception of the channels for inserting the elastic at the cuffs. The Fabric Store's merino is always lovely to work with and this was no exception. It moved through the machine smoothly, and the curved front yoke seam presses into shape easily giving a nice curved line. 

The second top is the Friday Pattern Company Adrienne Blouse. The fabric is a leopard print rayon jersey from Spotlight. As with the first I sewed it up almost entirely using my overlocker. However unlike the merino this fabric was not the most cooperative. It is a very soft and almost slinky fabric which makes it lovely to wear but also very slippy to work with. It was not always easy to get it to move neatly through the machine as it would slip to the left away from the blades. I had to hold the fabric at an angle to compensate for its movement.

The pattern is a very quick and easy make, and probably would be quicker and easier with a slightly more structured fabric. The hem is a bit wonky because it wouldn't go neatly through the overlocker and didn't even out even with pressing so the twin stitched hem isn't quite straight to compensate. If I make it again I'll probably slightly shorten the front neckband so that it sits flatter against the body. But the top itself, with its elasticated cuffs and shoulders, is a beautiful shape.

Overall, I'm very happy with all three of these garments. They each have little imperfections but they've turned out really well.


Sunday, 13 June 2021

Amber and the Swing Coat


 It's been a long time since my last post. So much so that I've gone from a quintessential summer item to very wintery makes with nothing in between.

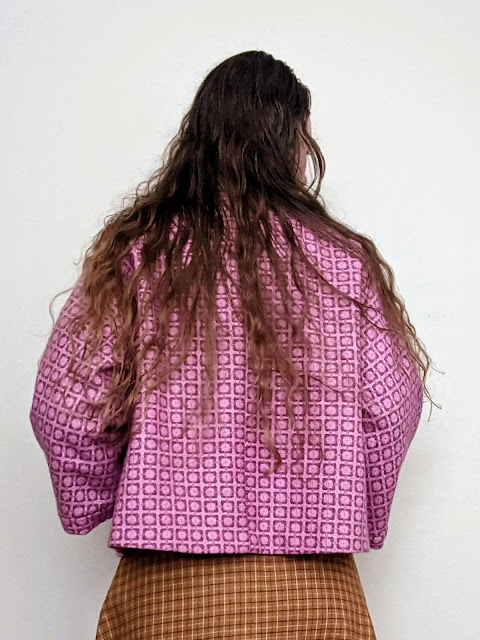
The jacket pattern is Simplicity 1319, which appears to now be out of print. It is a 1950s short swing coat with shawl collar. I made the longer length, although it still hits near the top of the hip. The fabric is a beautiful vintage wool I picked up at a Sydney Spoolettes fabric swap a few years back. It's very warm and has good structure and was relatively easy to work with. The lining is basic lightweight voile-weight cotton from my stash in pale baby pink. 

Overall, this pattern was reasonably good with only a few difficult elements. The way the shawl collar is constructed is designed to create pockets, with all the seams hidden inside. Both the lining and self fabric are folded over here, meaning there are four layers of fabric and the instructions for which pieces to fold which way were a bit confusing. I sewed one side what I thought was the right way but when I tried to turn it back the right way around it was twisted, so I had to unpick it, recheck and redo it to get it right. 

The biggest problem was with the length of the sleeves on the lining pieces. The instructions say the sleeve lining should be stitched to the seam allowance where the sleeve joins the cuff with the cuff then folded back in half and stitched down. But the sleeves of the lining piece are at least an inch too short to reach. Fortunately the cuffs are wide enough to fold in and stitch to the lining while still having part of the cuff visible, but it does mean the sleeves are a bit shorter. The pattern envelope shows the sleeves as being this slightly shorter length so I'm not sure if the problem was the illustration or the pattern pieces, but either way it didn't quite work how it was supposed to. 

The dress is the Named Patterns Amber Pinafore. The fabric is a viyella from The Sewing Basket in West Ryde, picked up on another Spoolettes outing. I've used viyella before and it's always been very soft, but this one is slightly stiffer and has a tendency to crease so requires a bit more ironing and effort to keep neat. I actually started making this dress a couple of years ago and never finished it, but pulled it out a few months back.

The waistline sits at just above the natural waist, with the deep v-necked bodice. The bodice pieces are all fully self-lined, but I left the skirt unlined as I didn't have enough of the fabric and didn't want to use a different fabric and possibly change the drape.

The back of the dress is racerback shape and does up with a buckle, but the fabric is prone to fraying so I only installed one eyelet. Only one is needed as it needs to be in the right place for the dress to sit properly and any more eyelets would just be cosmetic. Still, I would have liked to include a few more if the fabric was more stable and I was confident it wouldn't come apart.


The bodice being fully lined meant I was able to play around with how I wanted the check to sit, whether to have the centre front on the straight grain or on the bias. I decided the straight grain looked better, with the horizontal lines matching up more evenly. It also matches well to the skirt, which is approximately a half circle with the lines at the centre of the skirt matching the centre of the bodice and then curving with the bust seams.


I like the shape of the bodice pieces, but they do gape a bit at the sides. I initially thought I might have stitched them in the wrong way around (with the side edges in the centre front and vice versa), but when I tried changing them over the gaped more so I changed them back. I think if I trimmed the side edges to be shorter they would sit flatter, but it's a relatively minor issue and I decided it would take too much unstitching to be worth it to fix.


Overall I'm happy with both of these makes, despite a couple of small setbacks. I've worn the jacket several times already and found it a very good weight for transseasonal Sydney. The dress is something that can probably get wear through much of the year. 


Monday, 26 August 2019

Clear Sky Princess Coat


This coat has been a long time coming. I made my first winter coat back in 2006, when I had minimal experience and had never attempted anything at all comparable in terms of difficulty. It turned out pretty well and I have worn it ever since, but there were errors that I noticed more and more as I got better at sewing - the sleeve is caught slightly, the hem is not very neat, the thread I chose doesn't quite match the fabric, it's not quite warm enough. But making a coat was such a big task and battle with my machine that I put off making another one for a long time.


This coat is made with an Australiam Home Journal pattern that looks to be from the mid-to-late 1950s. Unfortunately Home Journal patterns aren't dated so I can know for sure. The coat has princess seams, a round collar and full-ish skirt. The sleeveheads are fitted, but the sleeves are slightly gathered at the cuffs. I've had the pattern for a few years, but had been daunted about making a new coat. I also wanted to make sure I found the right fabric to use. It needed to be thicker than my older coat, but also in a nice colour - just because it's winter doesn't mean coats have to be muted and dark colours. Wool is normally pretty expensive, too, so I wanted to be very sure and ready before I bought (and potentially ruined) pricey fabric.


I found this wool at The Fabric Store in June. It's thick and warm, and at $42 was surprisingly cheap for wool coating. I loved the crisp winter sky colour, and the fact that it isn't a flat blue. If you look closely, you can see that it's a yarn dyed fabric with some variation from a light blue through to a grey. There's also a bit of pinky grey in the fabric according to all the fluff I cleaned out of my machines. The differences aren't large, but enough to give it some more depth.


Being a vintage pattern, it came in only the one size and did not include seam allowance. Markings on the pattern pieces are almost non-existent, so I had to make sure I paid close attention. I kept the fabric pinned to the pattern pieces until I needed to sew them to make sure I didn't get mixed up. I made only one change to the pattern, lengthening the sleeves as the original is bracelet length. I added about 3 centimetres, so they are long enough to keep my wrists warm but not too long to bunch up on my hands.


It took a long time to get this coat finished, partly because I took a three week break in the middle of making it. I'd been following the instructions closely, but vintage patterns don't give much detail, and no illustrations of the steps. When I got to the cuffs, the instructions just made no sense at all. The weather wasn't cold despite it being winter, so there wasn't a need to get a warm coat finished quickly, so I put it to the side. I reread the instructions every few days but it never made any more sense, so I didn't do any more work on it until the weather was predicted to turn cold again.


In the end I ignored the instructions for the cuffs and just worked it out for myself. They're probably the least neat part of the coat and might have been better if I'd followed the instructions, but I didn't want to run the risk of making a mistake. They still look fine, and I think anything I did to try and 'fix' them would probably end up looking more uneven, so I will just leave them be. And apart from the cuffs it was a smooth - if slow - sew.


Originally I was planning to use a different lining for this coat. I have some vintage 1950s lining with orange and blue roses that perfectly match the wool. Unfortunately, the piece was too small. I tried any and all pattern placements but simply couldn't get them to fit. Luckily I also had this cream and black polkadot lining in my stash, and the piece was big enough for the coat. The polkadots also match the buttons better than the floral lining would have, so I got over my disappointment of not being able to use it this time.


The buttons are also vintage, although I'm not certain when they're from. I found them at Rozelle markets about five years ago. I decided to do snaps rather than buttonholes because the thick wool was hard enough to sew seams, let alone doing buttonholes. I didn't want to run the risk of ruining expensive wool when I could just as easily have decorative buttons and snaps. Hand sewing on eight buttons and snaps did take a lot of time, but I'm happy with the neatness of the end result.


All seams and facings are overlocked to stop fraying. I stitched the princess seams down flat to keep them neat and reduce bulk. Stitching the seams down also accentuates the shape of the seam lines. The side seams aren't stitched down, however, because I added in pockets. In terms of time, there's probably as many hours of work hand sewing as there is machine. The eight buttons and snaps are sewn by hand, as are the facings and cuffs. I considered machine sewing the hem but decided to hand sew that too to keep ot neat.


I am extremely happy with how this coat turned out. It definitely shows the benefit of all the experience I have in the last 13 years in the quality of the stitching and attention to detail. But my machine still wasn't very happy with me making this, so I suspect it will be another 13 years before I make a third winter coat.


Thursday, 31 May 2018

Happy When It Rains Dress


This is the Happy When It Rains dress, inspired by Shirley Manson of Garbage. It also started raining here in Sydney after a dry spell as I was finishing making this, so the name seemed to fit. It even rained as I walked home this evening.


The fabric is a piece of Viyella a found at a local op shop for $2. Viyella a blend of merino wool and cotton that is soft, light and still fairly warm. It's no longer made so can only be found second hand. This means it's also often hard to find and not cheap, so finding some for so little I had to snap it up.


The piece was quite small - 1.3m by about 90cm - so I was limited in what I could make. I looked through my patterns and found this one. I've made this before and love the shift dress shape with the added detail of the bodice seam lines. It's a vintage pattern, which also seemed appropriate for the fabric. My copy is the original 1960s pattern, but it's been rereleased as Simplicity 3833.


The seam lines on the empire line bodice are definitely the highlight of the dress, but also require patience to do. Connecting the bodice to the skirt can't be done all in one go - it requires at least three steps. I sewed each side seam and bust dart, then sewed the curved front from seam line to seam line. It was a bit difficult to sew without it catching, and easier to start from the side and then sew to the centre, so that seam was also sewn in two stages.


The rest of the dress was very straightforward to put together, but I did get to use my new overlocker to finish off the seams. A few weeks ago Aldi had craft and sewing supplies as their special buys, including a Janome overlocker for $199. I've been daunted by overlockers, but it was actualy very easy to use. It did help that the machine was already threaded with small spools so I haven't had to work that out yet, but the actual sewing went pretty well.


The hem and facings are all finished by hand. Because the fabric is mottled rather than a flat colour, trying to match thread was going to be tricky. But by finishing by hand I didn't have to worry about that and was able to give the dress a clean finish.


I really like the shape of this dress. The empire line bodice is closely fitted, but the rest of the dress skims out from there making it very easy to wear.  There's also a long sleeved version which I would have made if there was enough fabric, so I guess that will have to be what I do next time.


Tuesday, 18 July 2017

Cosy Wool Poncho Jumper


This is a very cosy lazy top. It's from the December 2016 issue of Burdastyle magazine and is described as an oversized pullover. The pattern is somewhere between a poncho and a jumper or even a snuggie, but with an elasticated waist.

the fanric is a $12 a metre bright cream hacci knit (I believe that's what it's called, it looks like a knitted jumper) from My Hung in Hurstville and is suprisingly warm for its weight. It's 70% wool and 30% poly, and is warm but soft to the touch and not itchy like wool can sometimes be. It drapes well, but still has a bit of body.


This pattern uses a lot of fabric. There are only three pieces - two front and one back - but each piece is wide, with a very long funnel neck. The pieces are too wide to be able to lay side by side on folded fabric, so I had to buy 2 metres of fabric to fit the pieces on. Unfortunately that means there is a reasonable amount of fabric wastage, with so big but awkwardly shaped scraps.


In the magazine there were two different versions of this pattern: this short elastic waist version, and a longer tunic-style version which has a curved high-low hem. I decided to cut out the longer version out, figuring I could always shorten it if it didn't lookright long. While it was very cosy longer, it didn't look right in this fabric, especially with the large neck.  So I folded the top flat along the centre front seam and cut the hem level.

The pattern sews together very easily. It is pretty straightforward, with the centre, shoulder and side seams all just straight lines. The neck is folded under and then stitched which I  initially tried to do with a machine zigzag stitch, but it got caught into the bobbin thread. So instead it is hand stitched in place which took longer, but isn't visible. For the waistband I decided to sew the elastic in directly to the waistband rather than inserting it into the already sewn hem. It requires a bit more care, but ends up cleaner and neater. I made the sleeve openings about 15cm wide, so the top rises slightly if I lift my arms up, but the volume of the top means it largely stays in place.


This top is wonderfully comfortable, and is definitely going to get a lot of wear for many years. It's simple and a lazy wear but still looks put together, and although light, it's also warm. I think it's going to be a great addition to my winter wardrobe.


Sunday, 14 May 2017

Winter Athena


It's been a while since I last posted a make, but I think this one has been worth the wait. This is the new Athena Blouse from Elise at Honig Design. I've previously made her garden party dress and really loved the pattern. I was lucky enough to be one of the testers for this pattern, and I've been waiting to post it since I finished making it.


Athena is a fitted blouse with double diagonal pleated darts. The diagonal darts are somewhat similar to Simplicity 2444, which is a great pattern I've made more than once. I made the version with bracelet-length sleeves, but there is also a short sleeved version. I chose the longer sleeved version so that I can wear it now that the weather is cooling down. I used a lightweight wool in grey and red check to have both some warmth but still a good soft drape.


I made a straight size 1 unlined and with no adjustments and it fits me well. The waist is close fitting, the bust slightly looser, and the peplum means the hips are loose. I'm slightly long waisted and the waist sits just above my natural waist. The neckline is high but not tight, but could be lowered pretty easily if you don't like high necklines.


I don't always pay a lot of attention to instructions (famous last words?) but given I was pattern testing this I made sure to read and follow everything exactly. Elise's instructions are clear and easy to follow. One of my favourite things is the inclusion of a progress bar showing how far you are through making it - there's a bar of squares at the top of each step which turn blue as you go along. For PDF patterns where the instructions are spread over more pages, it's a helpful piece of information. I'm sure that for less experienced sewists in particular it will be useful to be able to see how much is left to do.


Not only are the instructions clear, but the blouse itself is quite easy to make. There are eight pieces - bodice front, two bodice backs, peplum front, two peplum backs and two sleeves - but it isn't difficult to put together. The darts are sewn first and then the bodice pieces are sewn together. The same is done with the peplum, then the two are joined, the sleeves added and the zipper inserted last. Because I was using a woven wool I also covered all the seams in bias binding to prevent fraying.


I actually haven't worn this top yet, partly because I wanted to wait until Elise had released it, but also because it hasn't quite been cool enough yet. But I can see this top getting a lot of wear throughout winter. I think I'll probably also make a light shortsleeved version for summer, or even lengthen the peplum to a skirt and make it a dress. I definitely recommend others to make it if you think it looks interesting.