Showing posts with label 1950s. Show all posts

Sunday, 26 September 2021

The Australian Wildflowers Dress

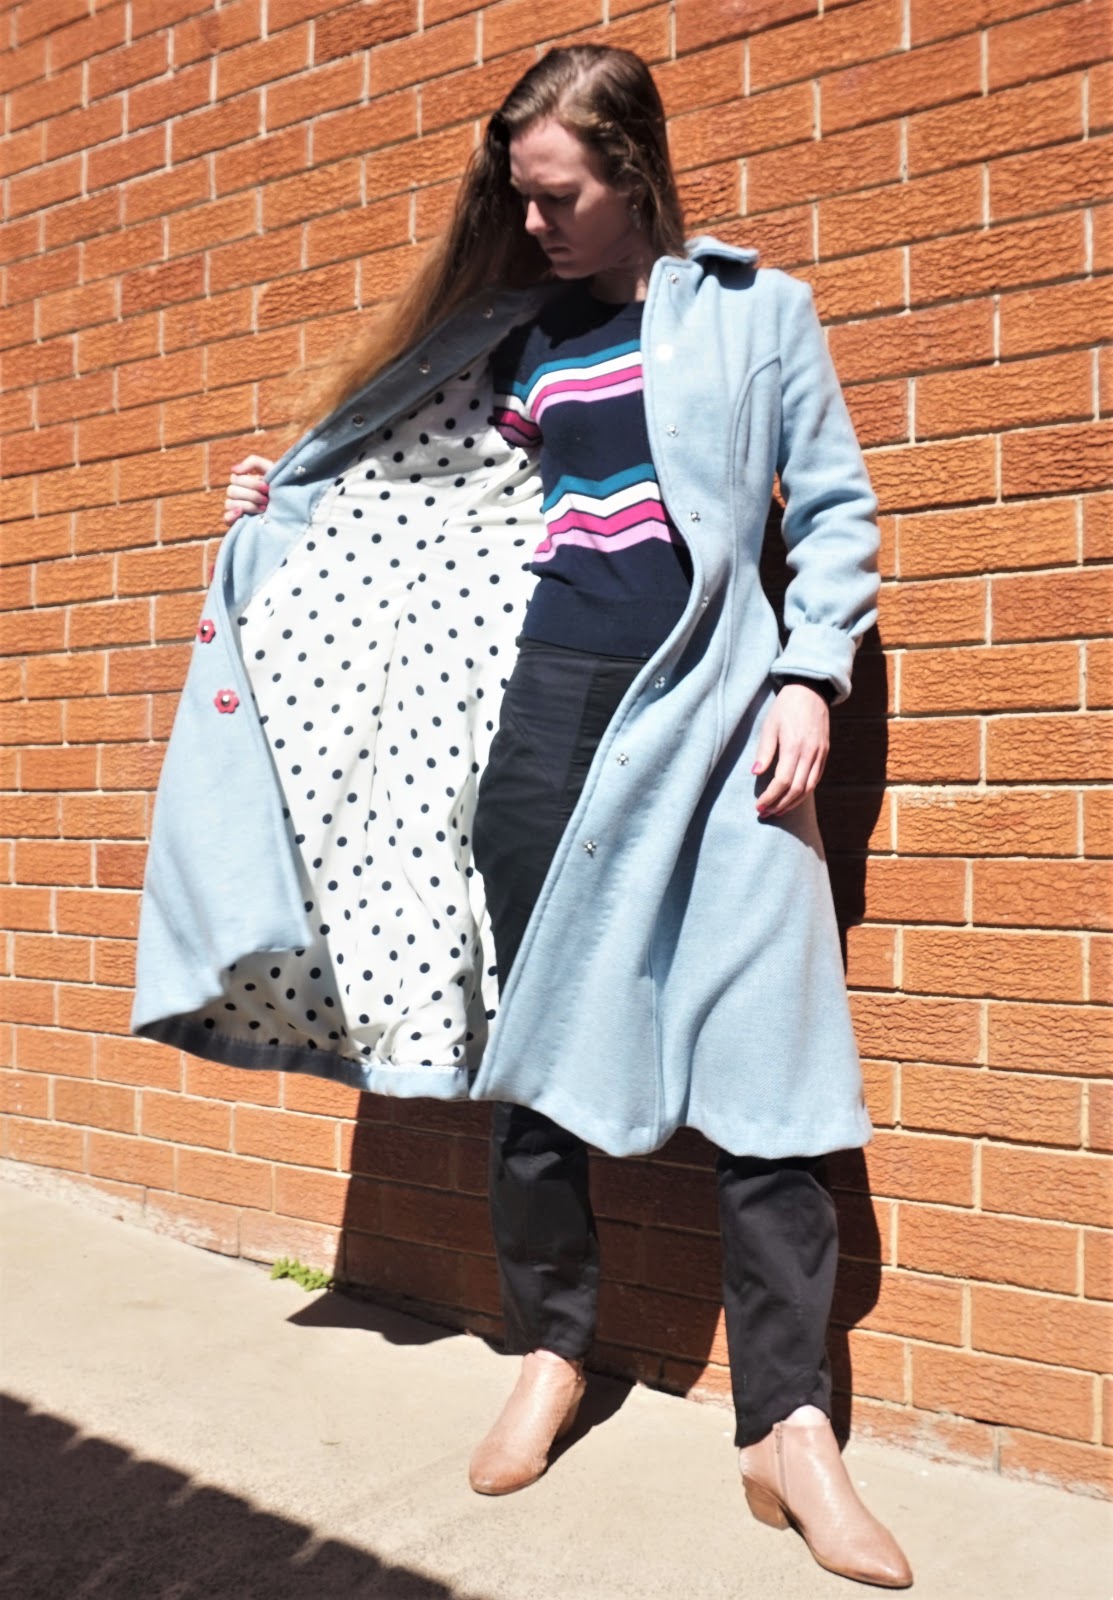
Although I do own a lot of original and reproduction vintage patterns and sew with them regularly, I do always try and pull them out especially in September for Sew Vintage September. Especially with Covid lockdown again it is nice to be able to see everyone's makes on Instagram and feel connected to others joining in the vintage sewing for the month.


Both the pattern and fabric have been in my stash for several years, although I hadn't really thought about them together. The fabric is such an amazing print but also very large, so it needed something that would do it justice. A full dress was always going to be the best option, but what sort of dress was the question, particularly how to make sure the skirt showed off the print. I had been thinking a circle skirt as it wouldn't hide anything in gathers, but the directional print would have meant some flowers ended up sideways or even upside down. In the end looking through my patterns and fabrics with both Sew Vintage September and the Whole 30 Fabric Challenge in mind led me to pull both fabric and pattern out together for the first time.

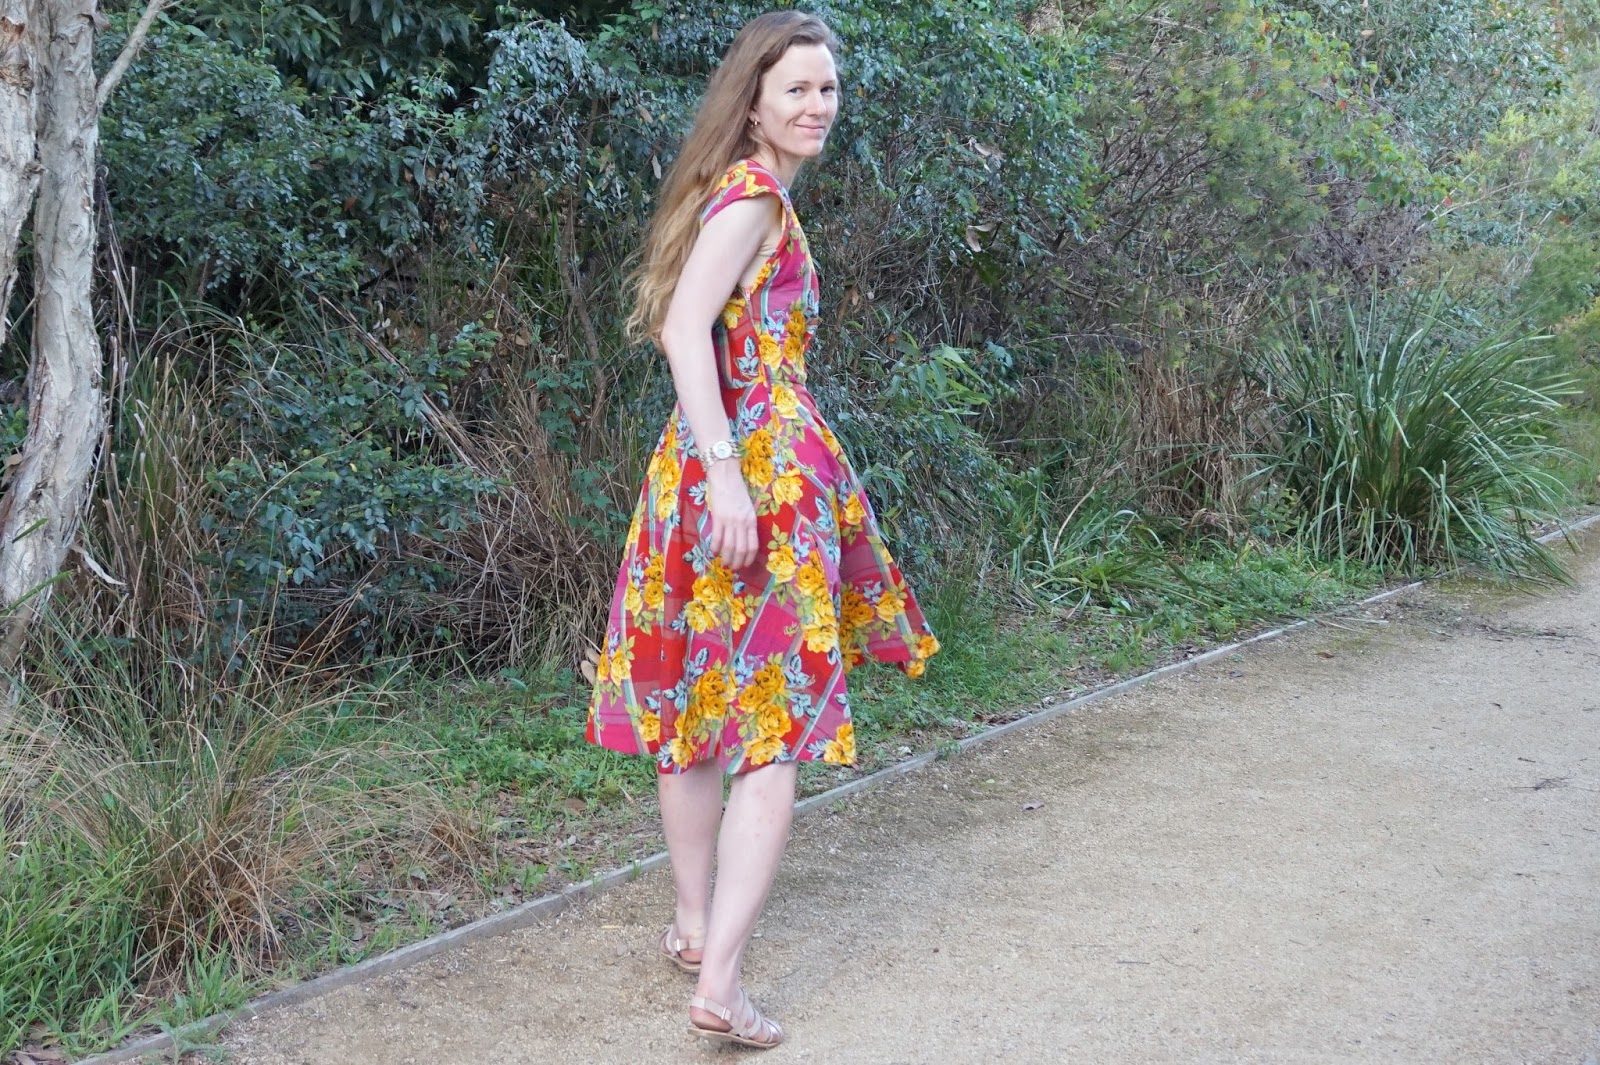
This absolutely beautiful fabric is one I picked up at a Sydney Spoolettes fabric swap a few years ago. The fabric design is called Australian Wildflowers and is covered in botanical drawings of different wildflowers, complete with common and scientific names as well as the states and territories they grow in.  There are flannel flowers, spider flowers, swamp and Sydney golden wattle, Cooktown, lemon and blue lady orchids, kangaroo paw, brown boronia, Sturt's desert pea and waratahs among others. The colours are wonderfully vibrant, and although a few arent' quite accurate to the flowers they depict they are all equally lovely drawings.


The pattern is Simplicity 4982 from 1955 and is an original, not a reproduction. It is a vintage size 12, measurements bust 30, waist 25 and hip 33. As an original pattern, there is a lot less ease than in modern patterns. The bodice is fitted and sits snug at the waist with maybe half an inch of ease. It could possibly do with an extra 1cm, but at the same time the closer fit probably helps to keep the bulk of the skirt from weighing the bodice down too much - the dress will pretty much stay in place without the straps because it simply can't sit lower down the waist.

Being an original 1950s pattern the shape of the upper bodice is very much designed to be worn with 1950s undergarments. The top edge of the upper bodice sat flat and correctly, but there was a lot of empty space between the top and the seam with the lower bodice. To remove some of the fullness I made the lower curve shallower and cut the sides of the piece straight rather than angled out to the lower edge. This kept the line of the top edge the same but reduced the height and width of the pattern piece so it was better sized.

The skirt is very wide and full. There are three 1.5m wide panels for a total width of 4.5m, while the bodice is only 66cm. This meant reducing down approximately 7cm of skirt for every 1cm of bodice. I gathered the skirt by hand in three sections, one for each skirt panel. It took approximately an hour to do the gathering and pin it in place, and then 15 minutes to carefully machine stitch it together. I had considered basting it together but ended up deciding the pins would be better at keeping the skirt from being pulled out of alignment while sewing. Because of the weight of the skirt I wanted to make sure the connection to the bodice was very sturdy, so I did a second line of stitching to make the connection more secure.

The bodice of the dress is lined, using a lightweight white lining. I sewed the straps in at the same time as attaching the bodice lining. To make sure I was still able to adjust the length each strap is two pieces: on attached in the front and one attached in the back. The zipper was installed before the lining was attached, and the lining was then machine stitched along the seam allowances joining the bodice pieces to keep the bodice and shell aligned, and hand stitched to the inside of the zipper tape and just inside the skirt seam. As with hand gathering the skirt this was a time consuming process but the finished product looks so much better for the effort.

The final step was to sew up the straps I had left open. As I mentioned there is minimal ease, so the dress sits close to the right spot when strapless. The original pattern actually has a strapless option where the bodice is boned, but I wanted this to be a bit more wearable so I included the straps. I pinned the two sides together at the shoulder before machine sewing at the top then trimming the excess and hand stitching closed. I probably pulled the straps up a couple of millimetres higher than needed, but it is to minor of an issue to be worth unstitching to adjust. 

Despite how big the dress is it only used 2.85m of fabric. The skirt is three panels 1.5m wide by 75cm long, with 30cm for the bodice and straps and another 30cm to line the bodice. The pattern actually suggests the skirt also be lined, but given the weight of this fabric I decided that was unnecessary. I haven't posted every make here on my blog - I may do a roundup post of the ones later - but this brings me to 15.15 metres or 16.5 yards of fabric from my stash used as part of the Whole 30 Fabric Challenge. Just over halfway through, a bit under 15 metres now to go.

I love how this dress turned out. The waist seam is snug so I can't slouch in the dress but the fit is close to perfect. It's feminine and fun and the weight of the fabric makes it very wearable. Although for now it can only be worn at home, this dress is brightening my lockdown days.


Sunday, 13 June 2021

Amber and the Swing Coat


 It's been a long time since my last post. So much so that I've gone from a quintessential summer item to very wintery makes with nothing in between.

The jacket pattern is Simplicity 1319, which appears to now be out of print. It is a 1950s short swing coat with shawl collar. I made the longer length, although it still hits near the top of the hip. The fabric is a beautiful vintage wool I picked up at a Sydney Spoolettes fabric swap a few years back. It's very warm and has good structure and was relatively easy to work with. The lining is basic lightweight voile-weight cotton from my stash in pale baby pink. 

Overall, this pattern was reasonably good with only a few difficult elements. The way the shawl collar is constructed is designed to create pockets, with all the seams hidden inside. Both the lining and self fabric are folded over here, meaning there are four layers of fabric and the instructions for which pieces to fold which way were a bit confusing. I sewed one side what I thought was the right way but when I tried to turn it back the right way around it was twisted, so I had to unpick it, recheck and redo it to get it right. 

The biggest problem was with the length of the sleeves on the lining pieces. The instructions say the sleeve lining should be stitched to the seam allowance where the sleeve joins the cuff with the cuff then folded back in half and stitched down. But the sleeves of the lining piece are at least an inch too short to reach. Fortunately the cuffs are wide enough to fold in and stitch to the lining while still having part of the cuff visible, but it does mean the sleeves are a bit shorter. The pattern envelope shows the sleeves as being this slightly shorter length so I'm not sure if the problem was the illustration or the pattern pieces, but either way it didn't quite work how it was supposed to. 

The dress is the Named Patterns Amber Pinafore. The fabric is a viyella from The Sewing Basket in West Ryde, picked up on another Spoolettes outing. I've used viyella before and it's always been very soft, but this one is slightly stiffer and has a tendency to crease so requires a bit more ironing and effort to keep neat. I actually started making this dress a couple of years ago and never finished it, but pulled it out a few months back.

The waistline sits at just above the natural waist, with the deep v-necked bodice. The bodice pieces are all fully self-lined, but I left the skirt unlined as I didn't have enough of the fabric and didn't want to use a different fabric and possibly change the drape.

The back of the dress is racerback shape and does up with a buckle, but the fabric is prone to fraying so I only installed one eyelet. Only one is needed as it needs to be in the right place for the dress to sit properly and any more eyelets would just be cosmetic. Still, I would have liked to include a few more if the fabric was more stable and I was confident it wouldn't come apart.


The bodice being fully lined meant I was able to play around with how I wanted the check to sit, whether to have the centre front on the straight grain or on the bias. I decided the straight grain looked better, with the horizontal lines matching up more evenly. It also matches well to the skirt, which is approximately a half circle with the lines at the centre of the skirt matching the centre of the bodice and then curving with the bust seams.


I like the shape of the bodice pieces, but they do gape a bit at the sides. I initially thought I might have stitched them in the wrong way around (with the side edges in the centre front and vice versa), but when I tried changing them over the gaped more so I changed them back. I think if I trimmed the side edges to be shorter they would sit flatter, but it's a relatively minor issue and I decided it would take too much unstitching to be worth it to fix.


Overall I'm happy with both of these makes, despite a couple of small setbacks. I've worn the jacket several times already and found it a very good weight for transseasonal Sydney. The dress is something that can probably get wear through much of the year. 


Monday, 26 August 2019

Clear Sky Princess Coat


This coat has been a long time coming. I made my first winter coat back in 2006, when I had minimal experience and had never attempted anything at all comparable in terms of difficulty. It turned out pretty well and I have worn it ever since, but there were errors that I noticed more and more as I got better at sewing - the sleeve is caught slightly, the hem is not very neat, the thread I chose doesn't quite match the fabric, it's not quite warm enough. But making a coat was such a big task and battle with my machine that I put off making another one for a long time.


This coat is made with an Australiam Home Journal pattern that looks to be from the mid-to-late 1950s. Unfortunately Home Journal patterns aren't dated so I can know for sure. The coat has princess seams, a round collar and full-ish skirt. The sleeveheads are fitted, but the sleeves are slightly gathered at the cuffs. I've had the pattern for a few years, but had been daunted about making a new coat. I also wanted to make sure I found the right fabric to use. It needed to be thicker than my older coat, but also in a nice colour - just because it's winter doesn't mean coats have to be muted and dark colours. Wool is normally pretty expensive, too, so I wanted to be very sure and ready before I bought (and potentially ruined) pricey fabric.


I found this wool at The Fabric Store in June. It's thick and warm, and at $42 was surprisingly cheap for wool coating. I loved the crisp winter sky colour, and the fact that it isn't a flat blue. If you look closely, you can see that it's a yarn dyed fabric with some variation from a light blue through to a grey. There's also a bit of pinky grey in the fabric according to all the fluff I cleaned out of my machines. The differences aren't large, but enough to give it some more depth.


Being a vintage pattern, it came in only the one size and did not include seam allowance. Markings on the pattern pieces are almost non-existent, so I had to make sure I paid close attention. I kept the fabric pinned to the pattern pieces until I needed to sew them to make sure I didn't get mixed up. I made only one change to the pattern, lengthening the sleeves as the original is bracelet length. I added about 3 centimetres, so they are long enough to keep my wrists warm but not too long to bunch up on my hands.


It took a long time to get this coat finished, partly because I took a three week break in the middle of making it. I'd been following the instructions closely, but vintage patterns don't give much detail, and no illustrations of the steps. When I got to the cuffs, the instructions just made no sense at all. The weather wasn't cold despite it being winter, so there wasn't a need to get a warm coat finished quickly, so I put it to the side. I reread the instructions every few days but it never made any more sense, so I didn't do any more work on it until the weather was predicted to turn cold again.


In the end I ignored the instructions for the cuffs and just worked it out for myself. They're probably the least neat part of the coat and might have been better if I'd followed the instructions, but I didn't want to run the risk of making a mistake. They still look fine, and I think anything I did to try and 'fix' them would probably end up looking more uneven, so I will just leave them be. And apart from the cuffs it was a smooth - if slow - sew.


Originally I was planning to use a different lining for this coat. I have some vintage 1950s lining with orange and blue roses that perfectly match the wool. Unfortunately, the piece was too small. I tried any and all pattern placements but simply couldn't get them to fit. Luckily I also had this cream and black polkadot lining in my stash, and the piece was big enough for the coat. The polkadots also match the buttons better than the floral lining would have, so I got over my disappointment of not being able to use it this time.


The buttons are also vintage, although I'm not certain when they're from. I found them at Rozelle markets about five years ago. I decided to do snaps rather than buttonholes because the thick wool was hard enough to sew seams, let alone doing buttonholes. I didn't want to run the risk of ruining expensive wool when I could just as easily have decorative buttons and snaps. Hand sewing on eight buttons and snaps did take a lot of time, but I'm happy with the neatness of the end result.


All seams and facings are overlocked to stop fraying. I stitched the princess seams down flat to keep them neat and reduce bulk. Stitching the seams down also accentuates the shape of the seam lines. The side seams aren't stitched down, however, because I added in pockets. In terms of time, there's probably as many hours of work hand sewing as there is machine. The eight buttons and snaps are sewn by hand, as are the facings and cuffs. I considered machine sewing the hem but decided to hand sew that too to keep ot neat.


I am extremely happy with how this coat turned out. It definitely shows the benefit of all the experience I have in the last 13 years in the quality of the stitching and attention to detail. But my machine still wasn't very happy with me making this, so I suspect it will be another 13 years before I make a third winter coat.


Saturday, 9 December 2017

The Making Summer Happen Dress

A dress in this fabric has been a long time coming for me. It's Liberty of London Madras Check Hyderabad E. I've taken the bolt out at The Fabric Store probably every time I've been in there in the last two years but always put it back because the pink is very pink and the roses are very yellow, so I worried that the fabric might be a bit overwhelming. But restrained colours and prints just aren't me. So when the Fabric Store had one of their one-day sales last month I finally bought 1.5 metres ot make a dress.

The name of the dress comes from my work. Each year at my work we have a christmas/end of year decorations competition on our floor. This year there was a theme, one person's trash is another person's treasure. Our branch made a beach-themed diorama, complete with offcuts of the roses on this fabric as garden and repurposed sign edited from making it happen to making summer happen. I wore the dress - and we won!


The pattern is Weigel's 1358. Madame Weigel was an Australian pattern maker from the late 19th Centure to the mid 20th Century, most of that time run by Madame Weigel herself. I'm not 100% sure when this pattern is from, but based on the cut of the dress and the styling of the pattern envelope I'd guess it's from the mid 1950s.

The dress was very easy to make, but the instructions are very brief, just two short columns on an A4 piece of paper and one diagram of the cutting layout. I've noticed this on some older patterns - there was a clear understanding that women learned how to sew and didn't need much in the way of specifics of how to make a dart or insert a zipper.


I made a three changes to the pattern when making this, all to the skirt. The skirt is meant to be cut all in one piece with only one side seam. But the fabric is a check, and the lines would have sat at a strange angle along the centre front cut that way, so instead I cut two skirt pieces on the grain. I also raised the hem and gave it a slight high-low shape, ending just above the knee at the front and at the bottom of the knee at the back, and added pockets.

The only slight annoyance I have is that I cut the bodice slightly off centre. I was very careful when placing the skirt piece on the fabric to  make sure the centre front was in the middle of the check, but I didn't take the same care on the bodice, so the blue stripes are just a bit mismatched.

I love how this dress - or this "chic little model" as the instructions describe it - looks. The square neckline is a nice difference, and having a side zipper instead of a back zipper gives it a cleaner look. It has very simple darts in the front and back, extending up slightly over an inch from the waist. The very minimal sewing still allows the dress to fit well but also have a lot of ease of movement.


It's a very simple and versatile pattern, so I can see myself making many versions and variations on it. But for now I'll enjoy the bright pinks and yellows of this one.


Monday, 28 November 2016

The Marchioness Rose


This dress has taken about six weeks from start to blogging. There's quite a few pieces to the pattern, I had to add a lining despite the pattern not originally being lined, and I've both been busy at work and moved house, so there was a lot to do both with the sewing and with the rest of life.


The pattern is a 1950s Australian Home Journal pattern, number 5210. It's a shirt dress with shawl collar and pockets. The envelope describes this as a house frock, which makes it sound like something Betty Draper would wear. The big bright pink roses also look very Betty, so I thought I should accessorise the photos to match the dress. And my armchair really matches the era pretty well, too!


The fabric is one I picked up at a Sydney Spoolettes fabric swap earlier in the year. The fabric is Australian, the selvedge says it is from Marchioness Fabrics. It's very thin voile, almost gauze-like. This meant there was no way I could use the fabric without lining it. But I didn't want to lose the soft drape that it has. I also didn't want to lose the colours, so I had to find something to be a lining that wouldn't show through or dilute the vibrant pinks of the roses.


I found a baby pink cotton voile at The Fabric Store that fit the bill. Of course, two layers of voile still isn't particularly thick. For the bodice it was fine, and I decided to leave the sleeves unlined, but the skirt would need more than two layers of voile. To fix this, I decided to double line the skirt. I cut one set of the baby pink voile to be the lining, and another set which I stitched straight on to the main fabric, treating it all as one single piece.


I started work on the bodice first, putting in the front and back darts. There are also front insets at the yoke. They were a little daunting to insert because of the right angle at the bottom edge, but in the end they went in fairly easily. And the print is, well, a bit overwhelming so the insets aren't really noticeable - you can just see the line of them on the above photo if you look closely. On the pattern envelope the insets are edged with lace so they stand out, but that wasn't needed with this fabric.


The skirt was trickier to do because of the third layer of fabric. Although I stitched the second layer of pink voile onto my main fabric so I could treat it as one, it was still a bit slippy. I left the bottom hem until I'd attached the bodice and skirt together, and then left it to hang for a weekend so the hem would settle. It seems to have ended up even, but I will keep an eye on it in case the lining and skirt get out of alignment.


Being a shirt dress I needed to make sure to stabilise the front. But I wanted to make sure I chose an interfacing that would work with how light the fabric is - both in terms of the weight and the gauziness of it. In the end I chose a black net-like sew-in interfacing. It did mean I had to first stitch the interfacing to the facing, but it sits and flows better than an iron on interfacing would.


The original pattern had short sleeves, but I didn't think they were quite right for this fabric. I looked through my other patterns from around the same era, and decided I'd add the sleeves from my DuBarry 5265 coat dress pattern. The sleeves are meant to have cuffs, but I tried the dress on before adding the cuffs and decided they'd be a bit too overwhelming, and the sleeves would work fine it I simply hemmed them.


I actually had all the sewing done more than a week before I moved, as I needed to be able to pack up my machine and fabric. All that was left to do was rip open the buttonholes, add the buttons, and hid all the loose threads. Still, I had to get set up before I could even start on those last elements, and there are sixteen buttons on this shirt dress. The interfacing is also relatively solid but the fabric is light, so I wanted to be very careful when ripping the buttonholes open.


The buttons were probably the hardest choice in making this dress, because I didn't know what would suit this fabric. It obviously needed a large number of buttons (sixteen in the end!), but what would complement the flowers? I have a large collection of buttons, but I didn't have anything that worked, or that had enough buttons. I wasn't going to find something that faded in to the background on this fabric, so I chose the gold as I thought they would stand out but not clash.


I'm really proud of this dress. To be honest it feels a little fancier than I normally am, like it needs a very put-together person. Not simply something that is pulled out of the wardrobe on a whim. But the fabric is just so stunning, and so perfectly suited to the pattern, so I'm sure I will find reasons to wear it. Although probably without the heels.