A dress in this fabric has been a long time coming for me. It's Liberty of London Madras Check Hyderabad E. I've taken the bolt out at The Fabric Store probably every time I've been in there in the last two years but always put it back because the pink is very pink and the roses are very yellow, so I worried that the fabric might be a bit overwhelming. But restrained colours and prints just aren't me. So when the Fabric Store had one of their one-day sales last month I finally bought 1.5 metres ot make a dress.
The name of the dress comes from my work. Each year at my work we have a christmas/end of year decorations competition on our floor. This year there was a theme, one person's trash is another person's treasure. Our branch made a beach-themed diorama, complete with offcuts of the roses on this fabric as garden and repurposed sign edited from making it happen to making summer happen. I wore the dress - and we won!
The pattern is Weigel's 1358. Madame Weigel was an Australian pattern maker from the late 19th Centure to the mid 20th Century, most of that time run by Madame Weigel herself. I'm not 100% sure when this pattern is from, but based on the cut of the dress and the styling of the pattern envelope I'd guess it's from the mid 1950s.
The dress was very easy to make, but the instructions are very brief, just two short columns on an A4 piece of paper and one diagram of the cutting layout. I've noticed this on some older patterns - there was a clear understanding that women learned how to sew and didn't need much in the way of specifics of how to make a dart or insert a zipper.
I made a three changes to the pattern when making this, all to the skirt. The skirt is meant to be cut all in one piece with only one side seam. But the fabric is a check, and the lines would have sat at a strange angle along the centre front cut that way, so instead I cut two skirt pieces on the grain. I also raised the hem and gave it a slight high-low shape, ending just above the knee at the front and at the bottom of the knee at the back, and added pockets.
The only slight annoyance I have is that I cut the bodice slightly off centre. I was very careful when placing the skirt piece on the fabric to make sure the centre front was in the middle of the check, but I didn't take the same care on the bodice, so the blue stripes are just a bit mismatched.
I love how this dress - or this "chic little model" as the instructions describe it - looks. The square neckline is a nice difference, and having a side zipper instead of a back zipper gives it a cleaner look. It has very simple darts in the front and back, extending up slightly over an inch from the waist. The very minimal sewing still allows the dress to fit well but also have a lot of ease of movement.
It's a very simple and versatile pattern, so I can see myself making many versions and variations on it. But for now I'll enjoy the bright pinks and yellows of this one.
Showing posts with label vintagepledge. Show all posts
Saturday, 9 December 2017
Tuesday, 28 November 2017
The Spring Garden Pants
I've been meaning to learn how to sew pants. I have tried a few times, but it's always daunting and I'm never as happy with how they turn out as with my other makes. But I wanted some new pants to wear to work, so I decided it was time for my next attempt at them. I own a few pants patterns and am planning to work my way up through them by difficulty level. Fitted side zip pants seemd like the easiest place to start.
The pattern is Vintage Vogue V9189, a high waisted pattern with two shorts lengths and two pants lengths originally from 1960. The amazing floral fabric is a cotton sateen with a bit of stretch from My Hung in Hurstville. I've seen a few floral pants around lately, and given it is almost summer here I thought bright floral would be the best choice. Plus, being a plain slim-fitting pattern these pants can handle a print better than a more traditional trouser.
One of the really good things about this pattern is that it comes with three different lengths: short, medium and long. Given one of the problems I've had making pants before was where the curve of the hip sat on the pattern compared to where it is on my body, it was good to know when I opened the pattern up that I'd be able to use the different lengths to make those adjustments before cutting out if I needed to. In the end I made the medium without any adjustments, but for others who are taller or shorter, or who have different leg and waist lengths, this pattern effectively does those adjustments for you.
These are definitely the best fitting pants I've made, but that was partly by accident. I'd almost finished sewing them up - except for the waistband and hemming - so tried them on. With other pants I've made they have often been a bit loose at the crotch and inner thighs, and these were as well. Given the slim fit of the pattern it really stood out, so I decided I would sew the seam in closer. I had intended to evenly take in 1cm and see how it looked, but when sewing the crotch curve the pants back pulled a bit and I ended up sewing it in 2cm. I noticed because the seam was not straight just after I'd sewn across the centre of the crotch so I stopped stitching.
I was going to immediately grab my seam ripper and unpick it all, but thought I'd first try them on to check if I'd at least dealt with the loose thigh issue. When I put them on not only did the leg fit better but the crotch on the side I'd taken in was also fixed, which was great. Of course, that meant I somehow had to recreate my accidental fix on the other side. Because I'd started sewing from the thigh for my accidentally correct adjustment, I decided to do the same for the other leg. I also marked where I'd become uneven between the front and back, and very carefully sewed it, using my fingers to adjust the back until I reached where I'd initially stopped.
There are slanted side pockets which are angled very close to the side seam making them slightly hidden. The pockets are understitched to try and stop them from turning out, but for some reason the righthand pocket facing doesn't always stay down. The side zipper was nice and easy to put in, just like a skirt's. The waistband also went in well - I have had patterns in the past where the waistband piece was too short or too long, but this one was just right.
As a finishing touch, the button is from my tin of vintage buttons I inherited from my grandma. I like that it's vintage, so fits with the era and style of the pants, the colour matches perfectly, and it's nice to have that connection to my grandma, who sewed a lot herself.
I am really proud of how these pants turned out. The fabric and the fit are just right, and they are just fun to wear. They've improved my confidence in making pants, and I plan keep working my way through the other patterns I own increasing the difficulty, including doing fly finishes. In the meantime, I'll be wearing these as much as I can.
Tuesday, 31 October 2017
Muriel's Chicken Frill Sundress
I'd originally planned this dress as part of Mena of Make This Look's Summer of the Pinafore (northern hemisphere summer) challenge on Instagram. I posted a picture of it almost finished (the facings hadn't been stitched down) and had planned to put it on the blog within a week of that. I finished this dress at the beginning of the month, but it's taken me four weeks to put it up on the blog. I took some photos a couple of weeks ago but when I downloaded them onto my computer the were blurry and the light was terrible. So I had to find a bit of time to do a take 2 and start again. And apparently I like looking to my right in photos.
The fabric is one I picked up at a Sydney Spoolettes fabric swap about 18 months ago, which was the first spoolettes event I went to and I think the first fabric swap. I loved the quirky retro oval-shaped chickens on it, so I had to pick it up. The sewing pattern has the name Muriel written on the envelope, hence the name for the dress. I found the pattern at a vintage fair about 10 years ago, and this is the second time I've used it.
The pattern is a 1948 McCall pattern, number 7904. The original pattern actually has two lines of gathered ruffles, at the princess seam which I kept but shortened slightly, and around the armscye. I decided to leave that ruffle off because it would have looked a bit too costumey. I also did in seam pockets instead of the giant patch pockets of the pattern. The skirt is shortened from a couple of inches below the knee to just above to make it a bit more modern and wearable.
Because I have used the pattern before it was fairly easy to sew up. I even managed to pattern match the chickens down the front of the dress. However when I made it before I'd made the second version, which has short puffy sleeves rather than ruffles. I did a bit of playing around with exactly how I wanted the shoulder ruffle to be. The instructions were to simply gather the ruffle, but I wasn't sure it would look right, especially given the envelope illustration shows them sticking up to chin height which would probably look ridiculous. In the end I decided to freehand pleat them, so they don't stick up high but they aren't sharply pressed either. They're fun, rather than obnoxious.
This make is also vintage, so is part of my vintage pledge for the year, which had been to create a capsule wardrobe. Whether it ends up being an actual capsule wardrobe or I just make a number of different types of vintage clothing pieces remains to be seen. And the fabric ended up being such a large piece that I was able to take the 1 metre remnant to the latest Spoolettes fabric swap on Sunday for it to be used by another Sydney sewist!
Saturday, 16 September 2017
The Pais-Liberty Skirt
I've been a bit slack on posting for a while, and very slack on my Vintage Pledge for this year but with this post I'm starting to rectify that with this colourful paisley print skirt.
This skirt is a very simple and classic A-line. The pattern is Simplicity 8363 from 1969. I made version 1, without the pockets or suspenders. It's a teen sized pattern which are sized a bit differently (they generally have a wider waist and narrower bust) but I didn't have to make any adjustments. Given the skirt is A-line, it simply needed to fit my waist and the shape would be fine on the hips.
This was a very straightforward sew. I've made this skirt before, version 4 in a fabric almost identical to the envelope. This time it's the plainest version of the skirt possible. I've done French seams again, so everything is neat and tidy inside. The waist facing was hand sewn for neatness, but the hem is machine done. I don't tend to like visible stitching, but the fabric is so busy that the stitching doesn't stand out.
The fabric is from The Fabric Store. It's Liberty Darlington Twill. I haven't sewn with Liberty much because it is pricey and I don't want to mess it up, but it is so lovely to sew. It cuts easily and evenly and glides through the machine, and the colours are so wonderfully vibrant. The fabric also simply feels great, unlike some others, especially cheap polyester. I have a few more pieces of Liberty in my stash, so maybe I will be motivated to pull them out and use them.
The jumper I'm wearing with this skirt is another new make, which should be up very soon too. And I have a few more things finished, partly made or ready to go, so hopefully this blog will become a bit more active - at least for a while.
Monday, 28 November 2016
The Marchioness Rose
This dress has taken about six weeks from start to blogging. There's quite a few pieces to the pattern, I had to add a lining despite the pattern not originally being lined, and I've both been busy at work and moved house, so there was a lot to do both with the sewing and with the rest of life.
The pattern is a 1950s Australian Home Journal pattern, number 5210. It's a shirt dress with shawl collar and pockets. The envelope describes this as a house frock, which makes it sound like something Betty Draper would wear. The big bright pink roses also look very Betty, so I thought I should accessorise the photos to match the dress. And my armchair really matches the era pretty well, too!
The fabric is one I picked up at a Sydney Spoolettes fabric swap earlier in the year. The fabric is Australian, the selvedge says it is from Marchioness Fabrics. It's very thin voile, almost gauze-like. This meant there was no way I could use the fabric without lining it. But I didn't want to lose the soft drape that it has. I also didn't want to lose the colours, so I had to find something to be a lining that wouldn't show through or dilute the vibrant pinks of the roses.
I found a baby pink cotton voile at The Fabric Store that fit the bill. Of course, two layers of voile still isn't particularly thick. For the bodice it was fine, and I decided to leave the sleeves unlined, but the skirt would need more than two layers of voile. To fix this, I decided to double line the skirt. I cut one set of the baby pink voile to be the lining, and another set which I stitched straight on to the main fabric, treating it all as one single piece.
I started work on the bodice first, putting in the front and back darts. There are also front insets at the yoke. They were a little daunting to insert because of the right angle at the bottom edge, but in the end they went in fairly easily. And the print is, well, a bit overwhelming so the insets aren't really noticeable - you can just see the line of them on the above photo if you look closely. On the pattern envelope the insets are edged with lace so they stand out, but that wasn't needed with this fabric.
The skirt was trickier to do because of the third layer of fabric. Although I stitched the second layer of pink voile onto my main fabric so I could treat it as one, it was still a bit slippy. I left the bottom hem until I'd attached the bodice and skirt together, and then left it to hang for a weekend so the hem would settle. It seems to have ended up even, but I will keep an eye on it in case the lining and skirt get out of alignment.
Being a shirt dress I needed to make sure to stabilise the front. But I wanted to make sure I chose an interfacing that would work with how light the fabric is - both in terms of the weight and the gauziness of it. In the end I chose a black net-like sew-in interfacing. It did mean I had to first stitch the interfacing to the facing, but it sits and flows better than an iron on interfacing would.
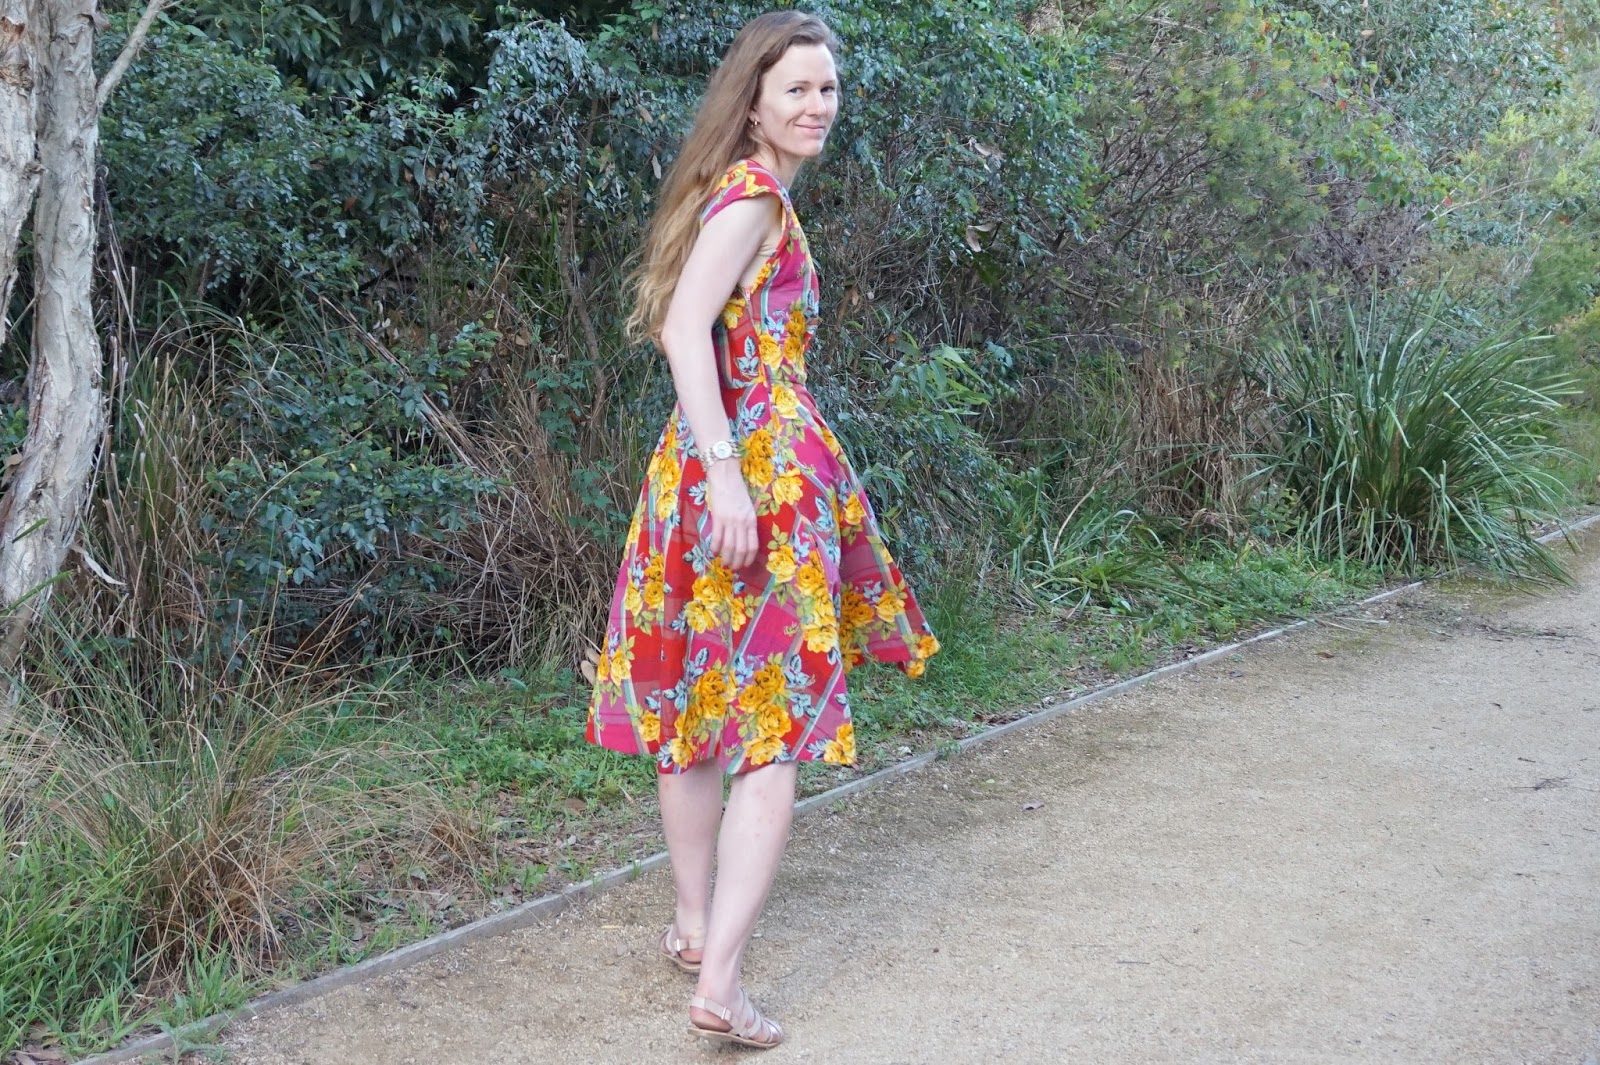
The original pattern had short sleeves, but I didn't think they were quite right for this fabric. I looked through my other patterns from around the same era, and decided I'd add the sleeves from my DuBarry 5265 coat dress pattern. The sleeves are meant to have cuffs, but I tried the dress on before adding the cuffs and decided they'd be a bit too overwhelming, and the sleeves would work fine it I simply hemmed them.
I actually had all the sewing done more than a week before I moved, as I needed to be able to pack up my machine and fabric. All that was left to do was rip open the buttonholes, add the buttons, and hid all the loose threads. Still, I had to get set up before I could even start on those last elements, and there are sixteen buttons on this shirt dress. The interfacing is also relatively solid but the fabric is light, so I wanted to be very careful when ripping the buttonholes open.
The buttons were probably the hardest choice in making this dress, because I didn't know what would suit this fabric. It obviously needed a large number of buttons (sixteen in the end!), but what would complement the flowers? I have a large collection of buttons, but I didn't have anything that worked, or that had enough buttons. I wasn't going to find something that faded in to the background on this fabric, so I chose the gold as I thought they would stand out but not clash.
I'm really proud of this dress. To be honest it feels a little fancier than I normally am, like it needs a very put-together person. Not simply something that is pulled out of the wardrobe on a whim. But the fabric is just so stunning, and so perfectly suited to the pattern, so I'm sure I will find reasons to wear it. Although probably without the heels.
Friday, 14 October 2016
70s/80s blouses for the 21st Century
A couple of new blouses today, although one of them was actually made six months ago. But being a short-sleeved blouse it hasn't been warm enough to photograph. Both patterns qualify as vintage, although I'm slightly loath to call the sleeveless one 'vintage' given it's from the 1980s and actually a year younger than me.
First up is my newest finished make, a loose-fitting sleeveless blouse. The pattern is Butterick 6583, a loose fitting girls' blouse pattern from 1984. Apparently children's size blouses work pretty well for me. It has options of dropped sleeves or sleeveless, I decided to go for the latter. It also has no darts, but instead has dropped shoulder seams with the bodice slightly gathered at the seam.
When I posted it on Instagram when I'd just finished it I wasn't 100% on it because it was looser than I expected.But that was a week ago, just before we were due to have our first hot day of the season on Monday (34°C). One comment on my Instagram pic suggested I'd be very happy with it in the heat on Monday, and Mel, you were right.
The fabric is surprisingly cool to wear. It's a fabric I got earlier in the year when the Sydney Spoolettes held a fabric swap, so I'm not sure of its origins. But it's a polyester yet has a nice drape, good softness, and more breathability than many polyesters do. So I was pleasantly surprised by that. The only thing that I needed to do at all different was to do French seams because the fabric gets that matted fraying that polyester tends to do very easily. But I do a lot of French seams anyway, so that wasn't a problem.
This second blouse is one a made way back on the Easter long weekend. The pattern is the same as my Perfect Blouse Pattern, but made with a basic short sleeve. It's made in a cotton from The Fabric Store, and is offwhite with a peach/mauve floral paisley print. The print is quite pale, but can been seen in the close up in the last picture.
I think part of the reason I hadn't posted this blouse before is because it's not exactly exciting. It's a nice pattern, and the back darts give a good shaping, but it is still just a straighforward work appropriate blouse. And honestly it's a little hard to think of anything else to say about it given I've already reviewed the pattern when I used it previously.
Anyway, so those are my two blouses to wear as the weather warms. And hopefully I can get this blog back on to a more regular schedule too!
Thursday, 14 July 2016
Birthday Pants
It's been a few weeks. I have been sewing, but haven't been photographing. But now I have a new make to show.
Today's my birthday, so these are my new cosy birthday pants. It's a very sewist thing to do, isn't it, to have a new creation as a present for yourself? Although these weren't really made to be such, they were just made this week because I needed them.
I made them over the last two nights so that I had something warm to wear in the Antarctic blast Sydney and much of southeastern Australia has experienced these last couple of days. In fact, this morning when I photographed these it was 3C, with an apparent temperature of freezing. But luckily these pants and the (not yet blogged) merino jersey top I had on were warm enough while I took pictures.
The pattern is from the late 1950s or early 1960s. It's Simplicity 4290, and is a highwaisted pant or short pattern with a side zip closure. I've used it before for my casual cotton summer pants. That time I made them looser and lowered the waistband, this time I kept the pattern almost as-is apart from lengthening the legs just slightly so the hem sits at the top of my feet rather than grazing the ankle. I wondered a bit about the high waist at first because it is very high - I'm longwaisted and the waistband sits above my belly button - but apart from it being a silhouette I'm not used to I am liking them.
The fabric was originally bought for a colour blocked dress I was planning to make with some remnant wool I have, but it turned out to be the wrong weight. It's a poly wool blend from My Hung in Hurstville. It's a slightly odd fabric, medium weight but with an almost fleecy underside. It's less scratchy than most medium and heavier weight wools and wool blends are, which makes it nice and comfortable. And it glided through my machine beautifully, which is always a plus.
It's an incredibly simple pattern to make, being just two front and two back pieces, two darts on each, a waistband, with trouser bar and zip to close. It's all very straightforward construction, and generally pretty quick. This pattern is vintage, but a modern pattern with a similar construction would be perfect for a beginner to making pants.
Although I have to admit I did have a little trouble with the waistband the first time around. My first go of stitching it looked terrible. The problem was I sewed it looking at the inside rather than the outside, and when I turned them right way around I discovered my stitching line wandered all over the place. And the one drawback of this fabric was it is terrible to unpick stitching from - the fleeciness makes it so that you basically have to undo each individual stitch, so it takes a bit of time. But once I undid it I was able to sew on the outside of the waistband and it was much better.
I'm not sure how much wear they'll get because they are warm fabric and Sydney generally doesn't get a lot of really cold days. But in today's cold I was very glad I'd made these.
Subscribe to:
Posts (Atom)