Showing posts with label 1970s. Show all posts

Monday, 26 July 2021

Winter's Rust Dress


It's cold in locked down Sydney, and my flat is very chilly. So I've been making warm clothes to have something comfortable to wear and also have something to do while stuck inside. This turtleneck dress in merino from The Fabric Store is a great addition to my winter wardrobe.

 A few weeks ago I came across the #whole30fabricchallenge, a challenge to try and use 30 yards (27.4 metres) before buying any new fabric. I have a lot in my stash, and given we are in lockdown due to Covid I have a lot of time to fill, so I'm going to try and give it a go. I'm not sure I'll get all the way through, and I don't think I'll do the rule of starting again if I buy new fabric, but I will get as far as I can. At least until my fabric stash is able to fit in the drawers it's meant to be stored in. With this dress I'm two metres into the challenge.

The pattern is a vintage Simplicity from 1974, Simplicity 5965 and is described as "designer fashion" although it doesn't say which designer. The pattern can be knee length or floor length for a fancier look. I don't tend to wear floor length gowns, so made the knee length version. My version is actually slightly shorter than the pattern's short version because I only had two metres of fabric and the pattern needed 2.15 metres. Where a lot of newer patterns have a lot of empty space on the cutting layout and can be squeezed into smaller pieces of fabric, this one did not have much spare space so I had to shorten the dress front and back pieces by about 5cm. But the pattern gives a generous 2 1/2 inches for the hem and I kept mine to 1.5cm so the finished length is about the same as the original pattern.

The fabric is a double faced merino from The Fabric Store in a deep rust. It is slightly more brown than I thought it was in the store, due to the lights in the back end of the store being slightly warmer than the clearer daylight closer to the windows at the front of the store. However this is a 1970s pattern, so the rust colour matches the era well. The fabric is double faced, so either side could have been the "right" side, but mostly it's thicker, warmer and has more stability. I chose to use the plainer side, as the other side had a very faint stripe which would have been hard to match well on this pattern, especially given fabric amount constraints. It likely wouldn't have been very noticeable, but I wanted to keep this dress looking simple to just have focus on the design lines.

The construction of the dress was quite simple as there are only five pattern pieces: two each for the front and back, two piece sleeves, and the collar. The collar is just slightly loose, so it stays high but doesn't cling. I'm not a fan of tight turtlenecks and skivvies so was a bit worried about how this one would feel, but this is very comfortable. The dress front is gathered slightly along the shoulder seams which gives a small bit of detail and interest while still keeping the simplicity of the dress. There is also a pattern piece for stays to stabilise the gathers on the front where the raglan sleeves join, for which I used bias binding. This was a bit of a deviation from the pattern as it meant I didn't press the seams open, but it keeps everything neat and there is no visible stitching of joining the stays to the sleeves. 

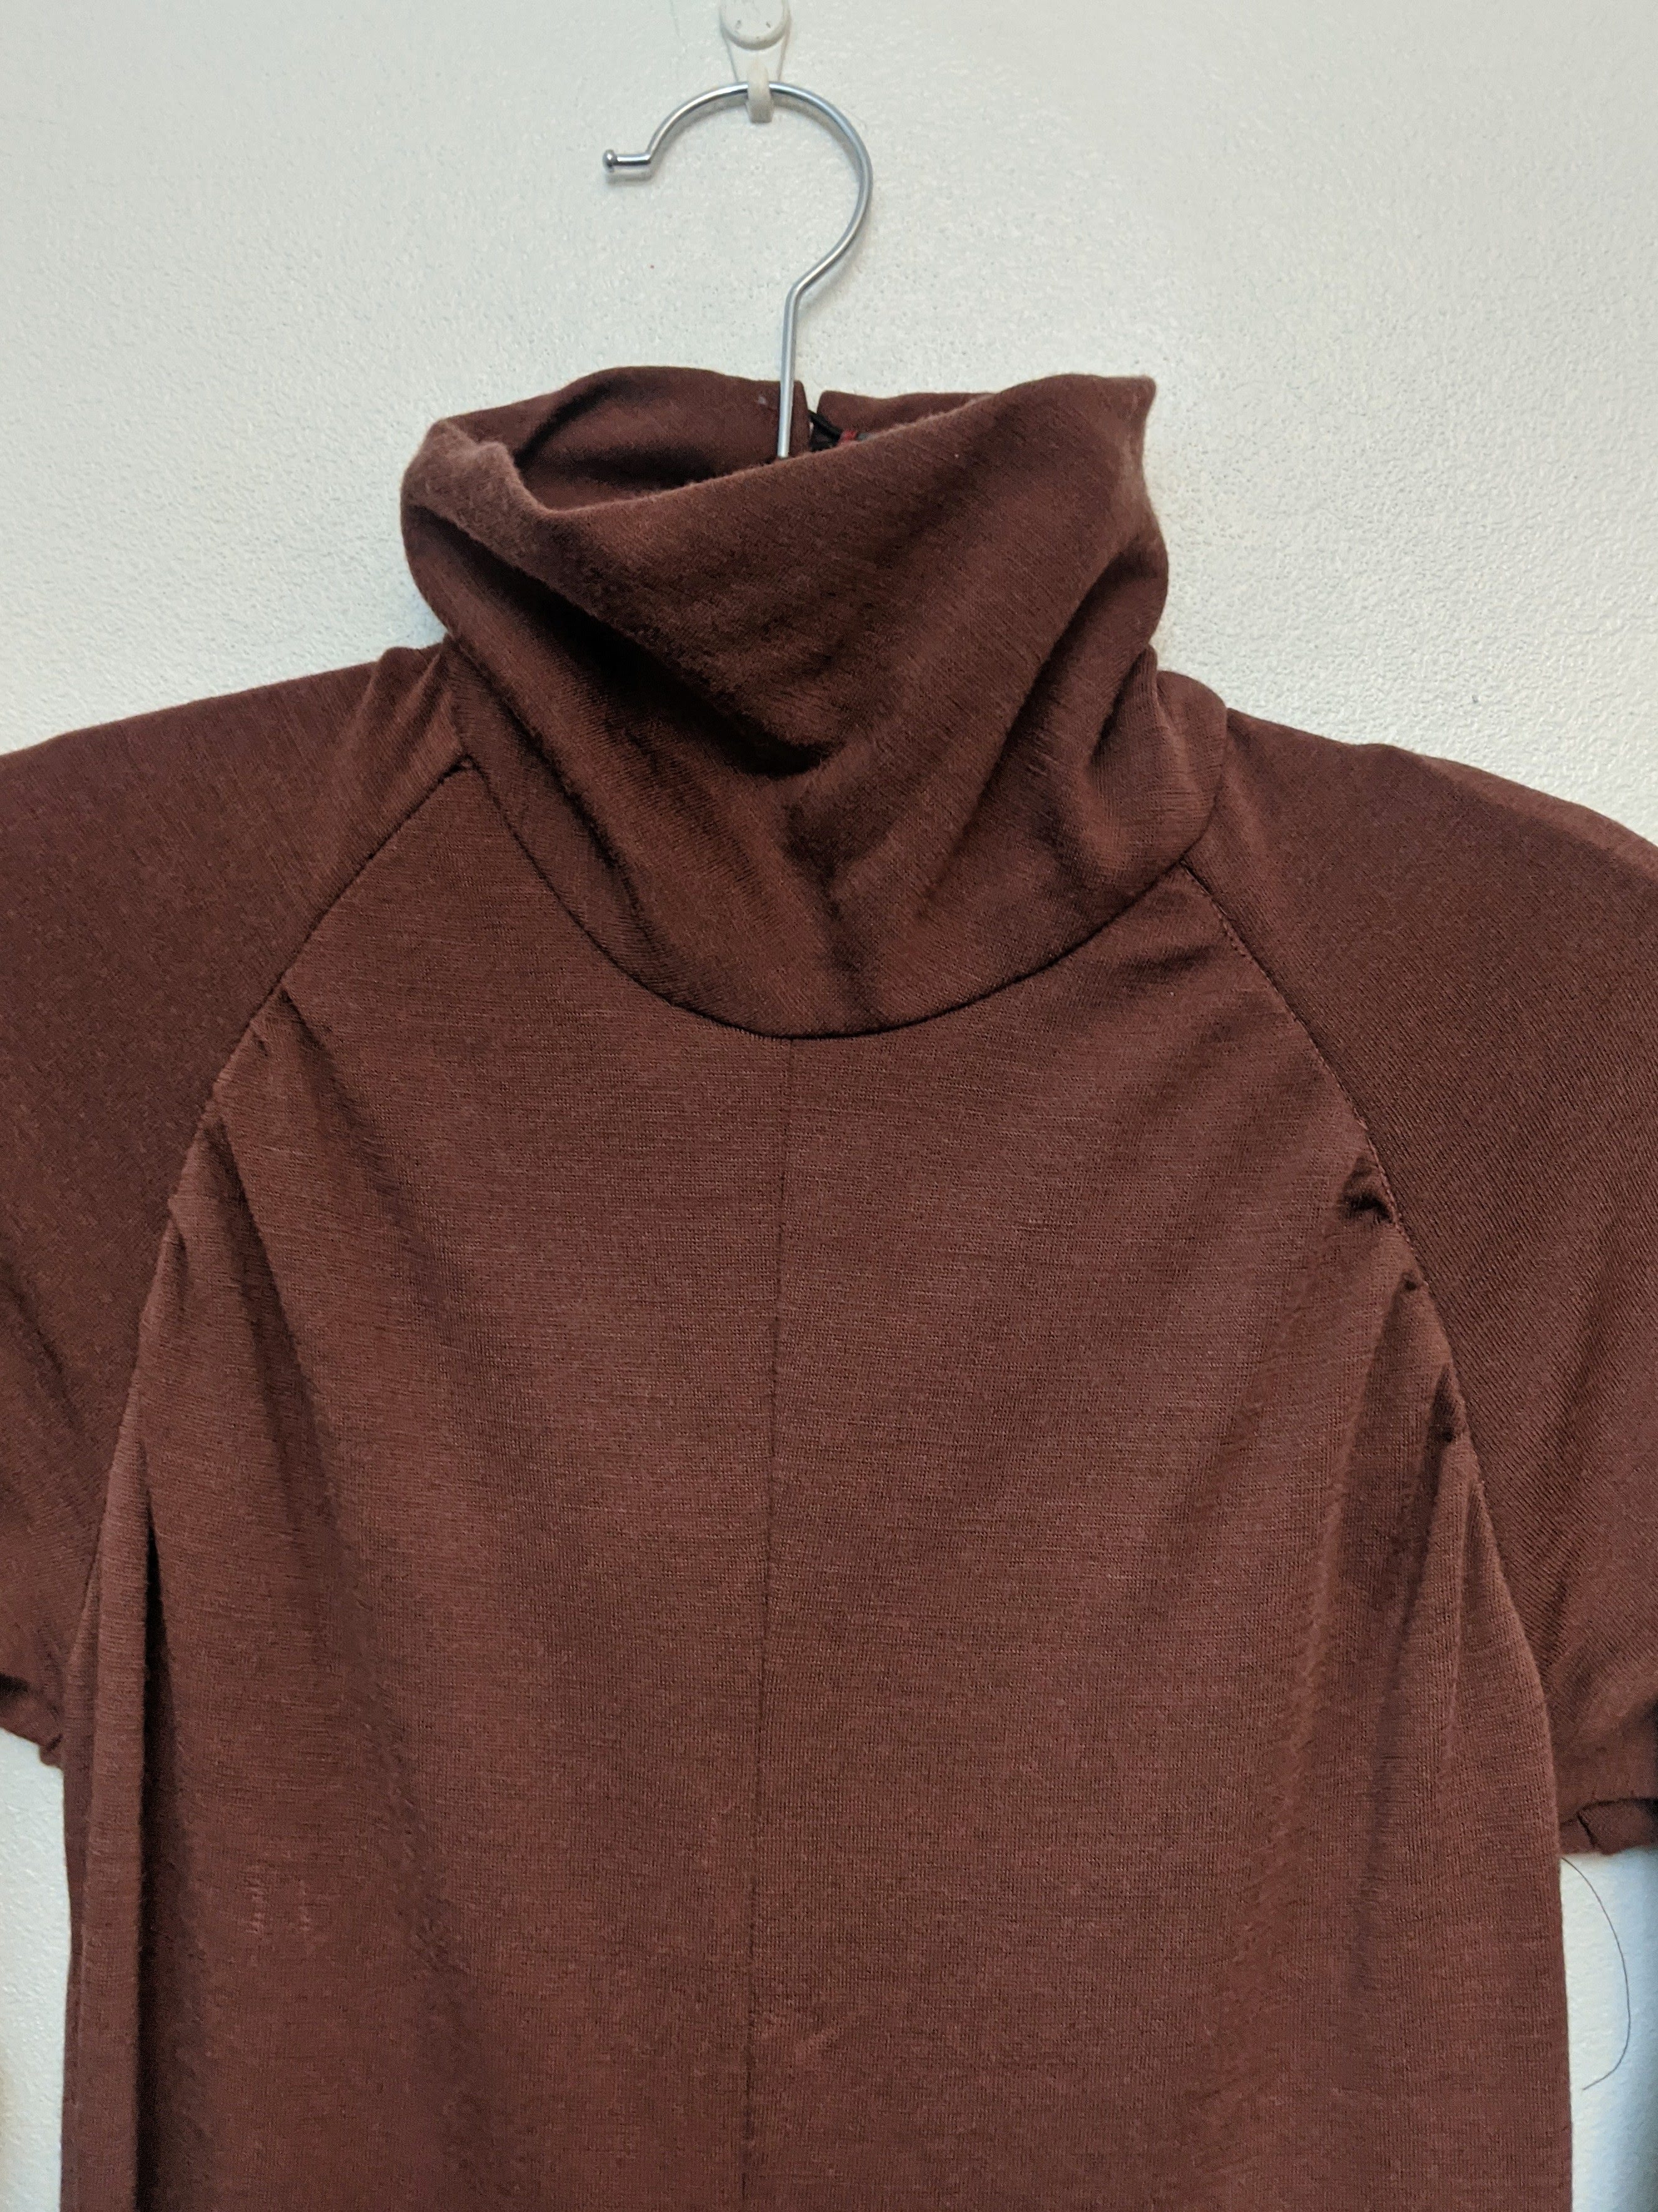
The pattern is a size 8, 31 1/2 inch bust and 24 inch waist and sits comfortably, with a neat fit but not clingy. The pattern has a centre front seam, which I often don't like but works well for this dress. Given it is a knit dress and relatively fitted to the waist, the centre front seam allows for some subtle shaping that wouldn't be possible if it was one piece cut on the fold. The dress would still work either way, but the centre front seam just makes it sit better and look that little bit fancier.

The dress closes with a zipper down the back and buttons for the collar. I was unsure exactly what buttons I wanted for this dress, whether I wanted something to closely match the fabric or have a contrast. I also needed to have at least three buttons for the neck to sit right (the pattern actually recommends 5 buttons) so I went through my button tins and pulled out a whole lot of different options and laid them on the dress to see which I liked best. I chose these vintage pearl buttons out of a tin I inherited from my grandma. They are simple buttons, but the cream colour both complements and stands out from the fabric in a way that works really well. The pattern suggested creating fabric loops for the buttons but the small size of these buttons made that difficult, so instead I've used black hat elastic.

The only thing I'm not entirely happy with is the zipper. I have a large collection of zippers, but didn't have any in shades of brown, deep red or dark tan which would have blended in to the fabric. Given Sydney is currently in a hard lockdown I can't go to a fabric or quilting shop to find a better zipper, and it's not worth ordering a single zipper as shipping would cost at least three times the price of a zipper. I looked through what I had to see which zipper might work and decided on this beige as it's neutral, but it isn't the best zipper installation so it shows more than I would like. I might try and see if I can press the fabric better to lie flatter against the zipper, or if it still annoys me when I'm able to go looking again I might replace the zipper with one in a better matching colour.

I'm very happy with how this dress turned out. It's comfortable, warm and has just a little bit of elegance. I'm certain it will get a lot of wear.


Saturday, 5 May 2018

The Tigermilk Dress


It's been a while since I last posted a new make. This was made mostly at the beginning of March, just before I went on holiday. I had thought I'd take it with my on my tip, but the ten buttons and buttonholes took a bit longer to finish than I'd expected.


The bodice fabric of this dress has had a few attempts before finally becoming this dress. I got the fabric from a fabric swap with the Sydney Spoolettes last year. It had already been cut into pieces for a straightforward pullover blouse, but never sewn up. It wasn't my style, but I loved the print. The pieces were for a large enough that I figured I could play around with them, and given it was a fabric swap they were free.


The pattern for the bodice is actually a blouse. The pattern is Simplicity 8009 from 1977. It had two options, sleeveless or puffy sleeves. Initially I decided to go for the sleeves.
The puffy sleeves were...not good. Although the fabric is soft, it didn't drape in the way I'd hoped, instead sticking out from my arms. So I removed the sleeves and used the fabric for sleeve facings instead. The length also didn't look quite right as a blouse, but the fabric is so nice and I liked how I'd sewn it together, so I decided to turn it into a dress.


The skirt fabric is from My Hung in Hurstville. I wasn't sure what colour would be the best choice, so I took a scrap with me and wandered around the store to see which one it matched with best. I was considering trying to match one of the colours in the bodice fabric, but in hte end decided to stick to something neutral. As it's just a simple A-line skirt I didn't bother with a pattern. I just measured the hem of the blouse and the length from my waist and cut out the fabric.


The dress title comes from Belle and Sebastian's first album, which I was listening to when I finished making it. And the retro feel of this dress suits their music. And tonight, it's getting an outing to see its namesakes perform.


Friday, 14 October 2016

70s/80s blouses for the 21st Century

A couple of new blouses today, although one of them was actually made six months ago. But being a short-sleeved blouse it hasn't been warm enough to photograph. Both patterns qualify as vintage, although I'm slightly loath to call the sleeveless one 'vintage' given it's from the 1980s and actually a year younger than me.


First up is my newest finished make, a loose-fitting sleeveless blouse.  The pattern is Butterick 6583, a loose fitting girls' blouse pattern from 1984. Apparently children's size blouses work pretty well for me. It has options of dropped sleeves or sleeveless, I decided to go for the latter. It also has no darts, but instead has dropped shoulder seams with the bodice slightly gathered at the seam.


When I posted it on Instagram when I'd just finished it I wasn't 100% on it because it was looser than I expected.But that was a week ago, just before we were due to have our first hot day of the season on Monday (34°C). One comment on my Instagram pic suggested I'd be very happy with it in the heat on Monday, and Mel, you were right.


The fabric is surprisingly cool to wear. It's a fabric I got earlier in the year when the Sydney Spoolettes held a fabric swap, so I'm not sure of its origins. But it's a polyester yet has a nice drape, good softness, and more breathability than many polyesters do. So I was pleasantly surprised by that. The only thing that I needed to do at all different was to do French seams because the fabric gets that matted fraying that polyester tends to do very easily. But I do a lot of French seams anyway, so that wasn't a problem.


This second blouse is one a made way back on the Easter long weekend. The pattern is the same as my Perfect Blouse Pattern, but made with a basic short sleeve. It's made in a cotton from The Fabric Store, and is offwhite with a peach/mauve floral paisley print. The print is quite pale, but can been seen in the close up in the last picture.


I think part of the reason I hadn't posted this blouse before is because it's not exactly exciting. It's a nice pattern, and the back darts give a good shaping, but it is still just a straighforward work appropriate blouse. And honestly it's a little hard to think of anything else to say about it given I've already reviewed the pattern when I used it previously.


Anyway, so those are my two blouses to wear as the weather warms.  And hopefully I can get this blog back on to a more regular schedule too!

Saturday, 2 April 2016

The Perfect Blouse Pattern

I found my perfect blouse pattern.


It's from 1974 (so is 2 of 8 for my Vintage Pledge for the year), the pattern is Style 4478, and I bought it for agrand total of 50 cents at a Salvos. It's also sized for pre-teen girls, but the measurements on the envelope were just right for me.


I'd been looking for a nice blouse pattern for a while, but none of the ones in the big four's catalogues really grabbed me. This pattern was cheap, and was much more what I was looking for. I did lengthen the hem by an inch, and could lengthen it further if I want to make a blouse that will tuck in to a skirt or pants. I also changed the bust darts to be straight rather than angled up so they'd sit at the right spot. But apart from those two minor modifications, the pattern was pretty much perfect.


The fabric is a rayon from Spotlight, bought last year. It's beautifully soft, and I love the vibrant colours in the print. Because it's an all over print I decided it had to be a long sleeve blouse - need to show off as much of it as possible! It frays a fair bit so I did French seams once again. Honestly I rarely do anything but French seams lately, they give such a nice clean finish.


I'm also really happy with how the sleeves look. I was worried that the gathered cuff would look too puffy and costumey, but it didn't end up as full as I thought it would. Instead, it's just got a nice bit of flow that really complements the drape of the rayon without the worry of getting in the way or dragging inadvertently in food.


Mostly it sewed up really well, apart from the hem. You can see in the photos that the centre fronts are slightly uneven. They were cut the same length, but when I folded the fabric under and stitched the hem the end got slightly stretched out of shape. I tried to redo it, but wasn't able to get it to fix properly. It might have worked better if I'd left the interfacing off the front, but it was necessary given the weight of the fabric.

Because the print is so nice I wanted to avoid visible stitching apart from the hem. So all of the front facing and collar are hand finished. I also used press studs instead of buttonholes, because as beautiful as this fabric is, it does love to fray, and I really didn't want to deal with buttonholes falling apart after the second wash. The buttons I used on top are maple leaves in a dark green-grey. They're cheap craft buttons, but I think they match the colour and print perfectly.


 So now I have a colourful and elegant blouse to add to my winter work wardrobe. And I've already made a second blouse from this pattern, a short sleeved version. I'll definitely be making more in the future.