Friday, 27 March 2015

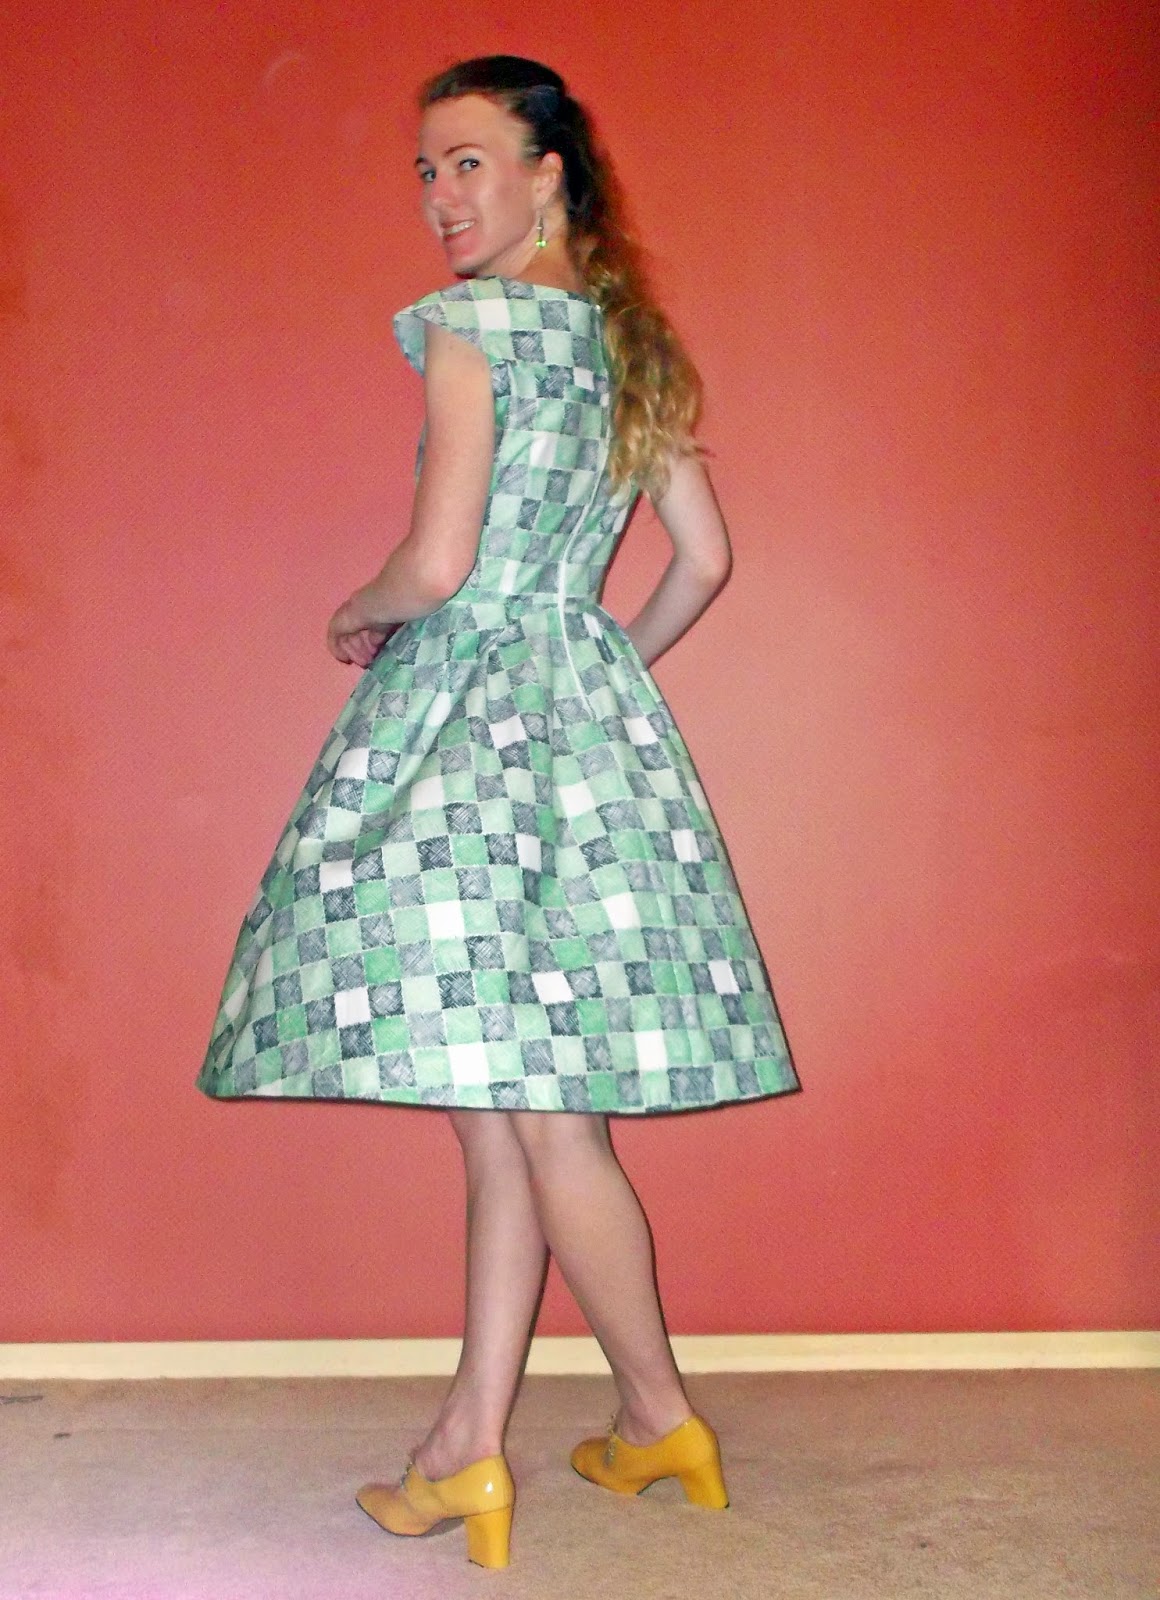
The Enviro Chessboard Dress


It's taken a bit longer than I wanted to get around to posting this dress. Making it was easy, but because of a useless phone and internet company who shall remain nameless but are the second largest telecommunications company in Australia and start with an O have left us without home phone and internet for a week and counting, so I have to visit neighbours if I want to do anything more than check an email. Lack of internet should give me more time for sewing, though, so there may be a backlog of projects to post once our internet issues are sorted.


The pattern is the absolutely lovely Project Runway 2444, which everyone should own. It has gorgeous double diagonal bust darts extending up from the centre waist, giving a classic and elegant feel, and diagonal pleats in the skirt. Being a project runway pattern it has a number of variations, and my version includes the cape collar. The dress even has pockets! More dresses should have pockets, they're so useful.

 This fabric is a vintage find, I'm not certain but I think it might date from the 1950s. So this dress is part of my 2015 vintage sewing pledge which A Stitching Odyssey is running. I pledged both to make vintage clothes and use vintage fabrics, six of each for some crazy reason, so this dress is one of my vintage fabric makes for the year. The dress itself does also have a vintage feel, but it's not a vintage pattern or vintage-inspired pattern, so it doesn't count for that part of the pledge.
 These two photos show the close-up of the cape collar and the diagonal darts. I was happy it turned out as well as it did - although the print is a grid, when I folded it to cut the pattern pieces out it didn't sit evenly. I checked that the edges were aligned, unfolded and refolded it, measured it, and it was still a bit uneven. Honestly, there's some weird magic going on with the fabric. The bodice piece is even horizontally, but was slightly off-kilter vertically. I covered it up as best I could by stitching the collar knot down on what should be the centre, so the unevenness isn't obvious unless you look closely.


Also, don't look to closely at the zip, the stitching isn't fantastic. Nothing like a fabric with clear lines to show up a crappy sewing job! As for the name of the dress, well the fabric with its crosshatched squares of green, black, and white does look like some sort of strange chessboard. And the green made me think of either mould or the environment, and the environment is a much nicer reference point than mould.


The fabric is quite weighty and thick, giving a good amount of body to the dress. I think this pattern works best with a weightier fabric, either a heavy cotton like this or a solid satin for something fancy. The other thing I like about this dress is that it feels grown up, like I'm a real adult - or at least playing at being one!


I tend not to make patterns multiple times, but this is the second time I've made this one and probably won't be the last. It really is a great and versatile pattern, and worth buying if you don't already own it.

Thursday, 12 March 2015

The Antheia Maxi Dress


I've had my eye on this gorgeous jersey at Tessuti Fabrics for something like three years. It's such a soft and beautiful viscose jersey with a really vibrant print. But it's also a wide fabric, 1.5 metres, and I didn't want to buy it unless I had an idea that would properly make use of the print. So mostly when I visited Tessuti I'd just look at it, pat it, and then move on. But when it was discounted at their post-Christmas sale, I decided to just go ahead and finally buy a metre and a half of it, hoping I'd work out what the fabric wanted to be when I got it home. And this is what the fabric decided it wanted to be.


I obviously decided this fabric had to be a maxi dress to make full use of the print - and I'm luckily just tall enough that it doesn't drag completely on the ground, as long as I wear the right shoes and hold up the skirt when going up stairs/steep hills. I had been thinking of putting a band at the empire line, but then while playing around with the fabric draped on my dressmaker's dummy Ilse-Jane, I tried out wrapping the dress to the front or back from the side seams, and it started to look pretty good. So I cut the fabric in half and did some more playing around with pinning until I finalised on this design. In fact, this dress involved no cutting apart from dividing my piece of fabric in half. Other than that, it is just two rectangles sewn together.


So the way I put this together was very much trial and error, translating the idea in my head when wrapping fabric around Ilse-Jane into a proper dress. I first had to work out the basics of how the dress would go together, then see if it would actually be wearable, then start sewing. So I put pins at the shoulders, pins under the arms, and pins from the waist down along the side seams. I left it unpinned between the underarm pins and the waist, so that I could then pull the edges of the back piece to the front and the front piece to the back to make it fitted at the waist. I tried it on (very carefully!) with all the pins just to check that it would look alright which luckily it did - and I didn't stab myself with all the pins! woohoo! - and then sewed up the side seams to a little below the waist, the shoulder seams, and about 10cm under the arms. I possibly could have sewn it a little higher on the side seams, but wanted to make sure I had enough room left to do the waist without having to do any unpicking.


Given the way the waistline is done, either the front will be stitched higher or the back will. I wasn't sure at first which I would choose, so I did a lot of pinning one first (higher) and then the other and comparin how they looked. I decided on having the front higher (stitching it first), as it then sits nicely at the empire line with slightly triangular folds under the bust. The back sitting lower also allows the skirt to have more of a flow from the sides and below. To finish off and keep the wraps staying where they should the front and back are stitched into place at the centre with a few hand stitches. I decided against machine stitches because I didn't want them to be visible. Finally I finished all the hem edges, and left the top edges as open sleeves, which I thought suited the style of the rest of the dress. Overall, this ended up being a very easy dress to make once I worked out what to do with the fabric. I'm generally not a huge fan of maxi dresses because they can be cumbersome, but I'm glad I made an exception for this one.

Finally, I should explain the name. When I came up with this idea, I thought it had a bit of an Ancient Greece/mythology feel about it - or at least Ancient Greece via the 1930s and Hollywood. So I wanted to give it a name that reflected that influence. And the best way to do that? Look up Greek mythology on Wikipedia and find the goddess of flowers, whose name was Antheia. Hence, this dress is the Antheia.

And it got a great first outing, too - seeing a concert at the zoo. Each year Taronga Zoo in Sydney has a series of 'Twilight at Taronga' concerts in lat Summer/early Autumn. Last Friday, Conor Oberst (one of my favourite performers) was playing. It was a beautifully warm and sunny evening, so I decided the Antheia should join in the occasion. Plus, it let me get this stereotypically Sydney shot: on a ferry, on the harbour, with the bridge behind.


 So I'm very glad I finally decided to buy this fabric I'd loved for years. And in using this wrapped/folded style, the full print is still being shown off all the way down the dress.

Sunday, 8 March 2015

The Carolyn Sari Pajamas


Almost all of my pajamas have either fallen apart or are on their very last legs, so when Heather Lou of Closet Case Files released her Carolyn Pajamas pattern recently it was perfect timing. And when she decided to have a pajama party in early March it was a good motivator to actually get them made quickly!


The pattern is very much a classic style of pajamas, and are very timeless and well designed. They also have pockets in the shorts! The pattern had a breast pocket, too, but I decided to leave that off this time, and I only put four buttons on the top instead of five because I only had four of the buttons I used. The fit is relatively slim for pajamas, so they look quite elegant, although if you're a person who prefers loose fitting PJs you'd probably be best to go up a size, especially on the shorts.

The fabric I used is actually a sari, which was given to me by a friend who knows how much I love to sew. She sews a bit too, and had been given the sari. but couldn't work out what to do with it. I didn't have any ideas either, because while it's a beautiful teal colour the fabric is a little thin so might not be the best for clothing. But when I saw the Carolyn pattern, I thought this would be perfect for it.


I made use of the embroidered edges of the sari for the cuffs of the shorts and sleeves. This meant adjusting the pattern slightly, by extending the length of both the shorts and sleeves so that the embroidered section formed the main part of both. I cut the sleeve just slightly too short, though, and ended up sewing some of the embroidery into the armscye rather than having it start just below, but that's a minor detail.

Because the sari fabric frays like crazy, I used french seams throughout. I found they helped the sleeves to set in better, which was great because I normally hate setting in sleeves (if a genie gave me three wishes setting in sleeves perfectly first time every time would be one of my wishes). I also hand finished the facings so that there wouldn't be visible stitching lines.


I had one hitch when making these - I discovered I had no elastic for the waistband! I also didn't have time to go searching for some, so I looked at what I could find when I had to go to the supermarket. Because it was a small supermarket they only had 6mm elastic.But Heather Lou had posted about different waistband finishes, including multi-channel elastic and waistband frills, so I decided to try out both with my narrow elastic. The picture on the right shows my double channel elastic waistband with top frill (as well as a close-up of the embroidery detail), which I actually really like and will probably do again. It's great when an error turns into a feature.


Overall, I really liked both the pattern and the final result. The instructions were nice and clear, the construction very smooth. Even with doing french seams, the pattern was very quick to make. This time I only made the shortsleeve and shorts version, but there's also long sleeve and long pants, which I plan to make as well with more of my sari fabric. But it's still very warm weather here even though Autumn has started, so I've probably got a bit of time before I need long-sleeve PJs.